github初心者がPull Requestを送ってみた時の手順

あなたはgithub使ってますか?
僕ですか?僕はcloneするばっかりでサービス自体は全く使ってないです笑
そんな超がつくほどのど初心者がgithubで他人のリポジトリにPull Requestを行ってみた!
既にいろんな方がやっているので、とくにメモする内容でもないが手順が多くて忘れるので完全に個人的な備忘録。
2通りのPull Request
Pull Requestには二通りの方法がある模様。
よくあるForkタイプ
Pull Request機能の解説としてよくあるのは「他の人のリポジトリを自分のGitHubアカウントにFork(コピー)してきて、変更を加えて、それを元のリポジトリに取り込んでもらうようにリクエストを送信する」といった感じのものではないでしょうか。
Forkしないタイプ
Forkしないタイプの「同じリポジトリを共有して、その中だけで行うPull Request」というものがあることを知りました。(以降、この方式を「リポジトリ共有式」と呼びます。これらの呼称は筆者が便宜上付けたものです)
※GitHubには、Fork & Pull Model / Shared Repository Model と書かれています。
ForkしないタイプはGitHubリポジトリにプッシュする権限が必要なので今回はよくあるForkタイプでやってみました。
githubにあるリポジトリを自分のリポジトリにfork
今回はwokamotoさんのstaticpress-s3にプルリクエストを送ってみます。
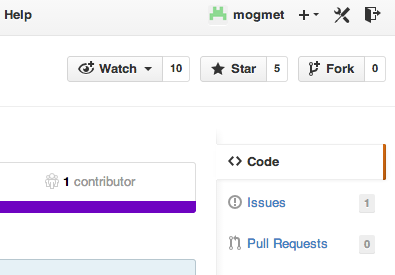
リポジトリにアクセスして右上にある「fork」ボタンを押下。
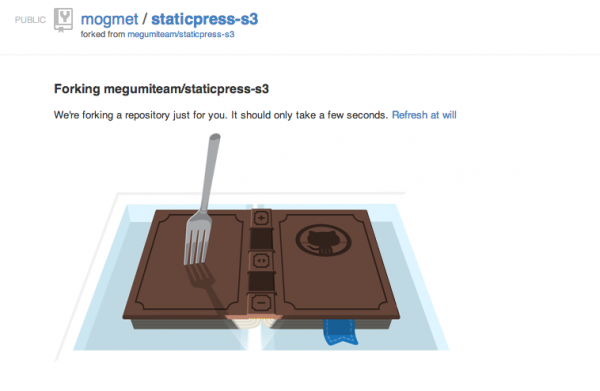
forkが始まります
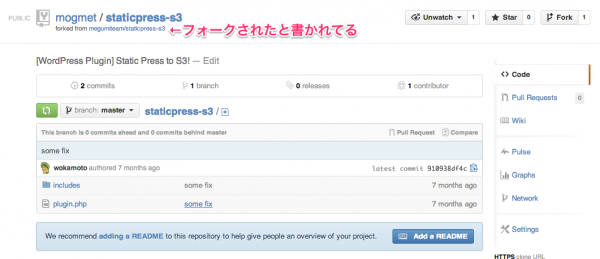
無事に終わるとぱっと見は変わらないように見えますがちゃんとフォークされてます。
forkリポジトリにコミットする
早速forkしたリポジトリをcloneします。
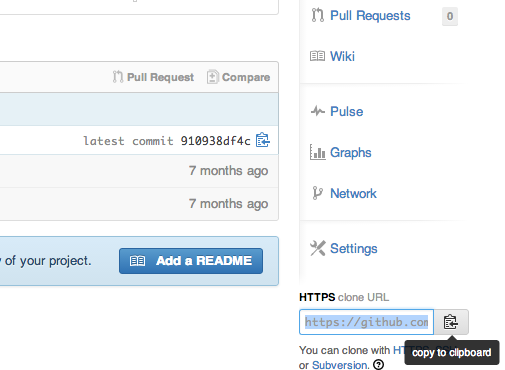
右下にレポジトリのgitアドレスがあるので「copy to clipboard」ボタンを押下してアドレスをコピーします。
次に自分のローカル環境でcloneします。
|
1 2 3 4 5 6 |
$ git clone https://github.com/mogmet/staticpress-s3.git Cloning into 'staticpress-s3'... remote: Counting objects: 14, done. remote: Compressing objects: 100% (10/10), done. remote: Total 14 (delta 4), reused 14 (delta 4) Unpacking objects: 100% (14/14), done. |
しかし慌ててここですぐにファイルを編集してはいけない。
cloneをしたあとに作業用ブランチをきるのがしきたりらしい
いきなりpull request用のブランチで作業するのではなく、作業用にさらに別のブランチを作ることをお勧めします。簡単な修正をするつもりでも、試行錯誤して何度もcommitしたり、最初からやり直したりするかもしれません。そのための作業用ブランチを別に切っておくというわけです。
べ、別に生き急いで編集しちゃったわけじゃないんだからね!
ということで早速cloneしたディレクトリに移動してブランチをきる。
|
1 2 3 |
$ cd staticpress-s3 $ git checkout -b fix_mimetype_bug Switched to a new branch 'fix_mimetype_bug' |
ブランチが変わっているかを確認する。
|
1 2 3 |
$ git branch -v * fix_mimetype_bug 910938d some fix master 910938d some fix |
ここまできてようやく編集を始める。
編集が終わったら、ファイルの状態を確認してみる。
|
1 2 3 4 5 6 7 8 9 |
$ git status # On branch master # Changes not staged for commit: # (use "git add <file>..." to update what will be committed) # (use "git checkout -- <file>..." to discard changes in working directory) # # modified: includes/class-S3_helper.php # no changes added to commit (use "git add" and/or "git commit -a") |
modifiedと表示され変更がかかっていることがわかる。
変更箇所を確認してみる。
|
1 2 3 4 5 6 7 8 9 10 11 12 13 14 15 16 17 18 19 20 21 |
$ git diff diff --git a/includes/class-S3_helper.php b/includes/class-S3_helper.php index 36e13f5..b80d431 100644 --- a/includes/class-S3_helper.php +++ b/includes/class-S3_helper.php @@ -184,9 +184,12 @@ class S3_helper { // get file_type private function mime_type($filename){ static $info; - if (!isset($info)) - $info = new FInfo(FILEINFO_MIME_TYPE); - + if (!isset($info)) { + $magic_file = '/usr/share/misc/magic'; + $info = file_exists($magic_file) + ? new FInfo(FILEINFO_MIME_TYPE, $magic_file) + : new FInfo(FILEINFO_MIME_TYPE); + } $mime_type = file_exists($filename) ? $info->file($filename) |
一応作者のコード記法にのっとって書いたつもり。
以上で問題なければコミット
|
1 |
$ git commit -a |
コメントは一行目に概要、改行をあけて3行目から詳細の内容を書くのがしきたりらしい。
|
1 2 3 4 5 6 7 8 9 10 11 12 13 14 |
fix mime-type bug Default magic_file can't take cognizance of right mime-type. So I added magic_file option. # Please enter the commit message for your changes. Lines starting # with '#' will be ignored, and an empty message aborts the commit. # # Committer: root <[email protected]> # # On branch master # Changes to be committed: # (use "git reset HEAD <file>..." to unstage) # # modified: includes/class-S3_helper.php |
保存して終了するとコミットされる。
リポジトリにpushするまえに一応念のためどこにpushするのかを確認する。
|
1 2 3 |
git remote -v origin https://github.com/mogmet/staticpress-s3.git (fetch) origin https://github.com/mogmet/staticpress-s3.git (push) |
問題なければ早速コミットした内容をリポジトリにpushする。
|
1 2 3 4 5 |
$ git push origin fix_mimetype_bug Username for 'https://github.com': mogmet To https://github.com/mogmet/staticpress-s3.git * [new branch] fix_mimetype_bug -> fix_mimetype_bug |
pull requestを送る
いよいよ修正した内容を送信してみる。
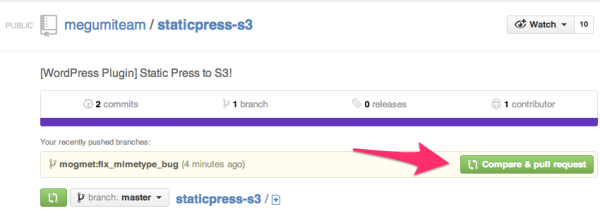
フォーク元のリポジトリをみると「Compare & pull request」ボタンが現れているので押下してやる。
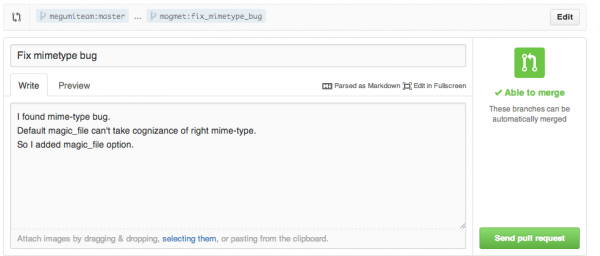
適当にそれっぽい文章書いて「Send pull request」ボタンを押下する。
これでPull Request完了。
あとはマージされるのを気長に待つ。
まとめ
svnと比べるとステップ数が多いのですぐ忘れちゃいそうだが、何度かやれば覚えることを祈ります。
git is 難しい。
