Ubuntu8.10上でVMware server 1.0.8をインストールしてみました
Ubuntu8.10上でVMware server 1.0.8をインストールしてみました。
2.0はなんだか不評なのであえての1.0.8。
1.シリアル取得
最初にインストール途中でシリアルをいれるところがあるのでシリアル取得の為、以下から登録する。

2.本体の取得
方法1
次に本体をここからひろってきます。

rpmとtar.gzの二つがありますが、Ubuntuはrpmではできないと聞いたので、Binary (.tar.gz) をダウンロードします。
方法2
このコマンドを実行することによっても取得できます。
- $ wget http://download3.vmware.com/software/vmserver/VMware-server-1.0.8-126538.tar.gz
こっちのほうが簡単かな?
方法1、もしくは方法2でダウンロードしたファイルがあるディレクトリに移動し、解凍します。
- $ tar zxvf VMware-server-1.0.8-126538.tar.gz
4.パッチファイルの取得
方法1

方法2
以下のコマンドを実行しても保存できます。
- $ wget http://www.insecure.ws/warehouse/vmware-update-2.6.27-5.5.7-2.tar.gz
方法1、もしくは方法2でダウンロードしたファイルがあるディレクトリに移動し、解凍します。
- $ tar zxvf vmware-update-2.6.27-5.5.7-2.tar.gz
5.インストールの準備
必要なものをインストールする為に以下のコマンドを実行
- $ sudo apt-get install build-essential xinetd
6.インストール
2.でできたvmware-server-distribフォルダに移動し、インストールを開始します。
- $ cd vmware-server-distrib/$ sudo ./vmware-install.pl
基本は全ての質問にEnterを押して答えていきます。
しかし途中の以下の質問ではnoと答えてください。
- Before running VMware Server for the first time, you need to configure it byinvoking the following command:
"/usr/bin/vmware-config.pl". Do you want this program to invoke the command for you now? [yes]no
noを選択すると一度インストールが終了します。
インストールが一度終了したら、次に4.でできたパッチファイルのディレクトリへいき、パッチファイルを実行します。
- $ cd ../vmware-update-2.6.27-5.5.7-2/
$ sudo ./runme.pl
このあとの質問もデフォルトで全てエンター。
その際にまた
- Before running VMware Server for the first time, you need to configure it byinvoking the following command:
"/usr/bin/vmware-config.pl". Do you want this program to invoke the command for you now? [no]
と、聞かれますが、その際にそのままEnterを入力するとインストールが終了してしまうので、yesと答えましょう。
もしそのままnoと終了してしまった場合は再び
- usr/bin/vmware-config.pl
を実行しましょう。
7.起動
さて、インストールがおわったらいよいよ起動します。
起動の仕方は
アプリケーション→システムツール→VMware Server Consoleで起動するか、
コンソールで
- $ vmware-server-console
とコマンドをうち起動します。
起動したら、
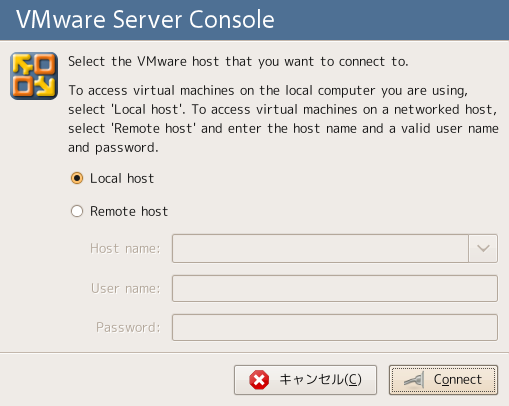
このような画面がでると思います。
ここでLocal hostを選択します。
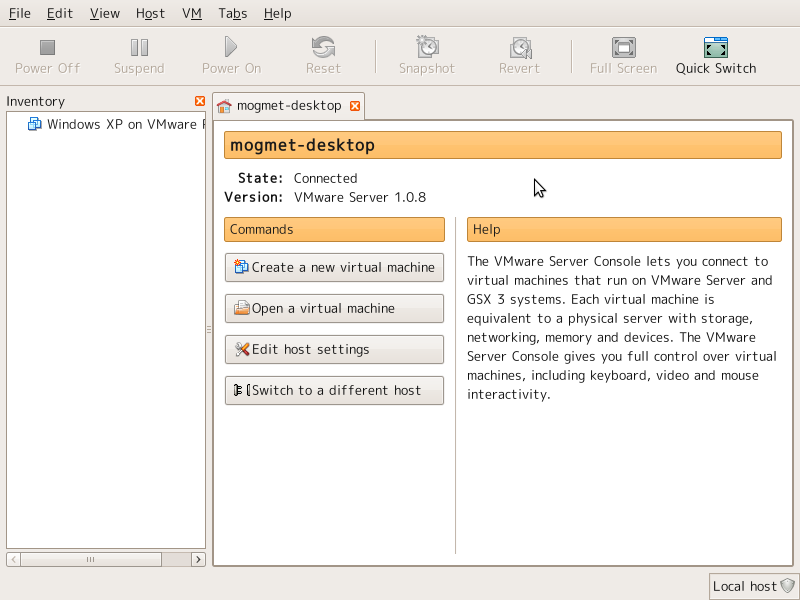
もし、vmxファイルがあれば、Open a virtual machineを選択して、vmxファイルを開きましょう。
ないようであればCreate a new virtual machineを選択して新規に作ります。
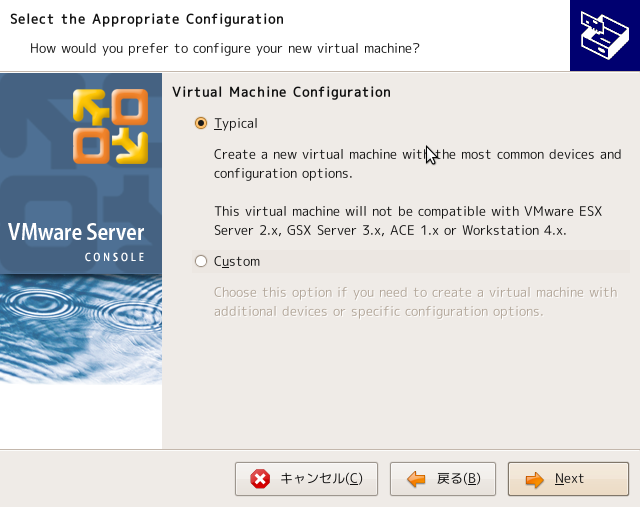
Wizardが開きます。

とくに難しく考えることなくTypical。
細かく設定したい人はCustomを選択すればいいと思います。
今回はみんなが大好きWindowsXPの仮想OSを製作します。

保存場所を選択します。

ネットワークの接続タイプを選択します。
Bridgeは仮想OS側で直接ネットワークに接続する方法
NATはホストOSを経由してネットワークに接続する方法
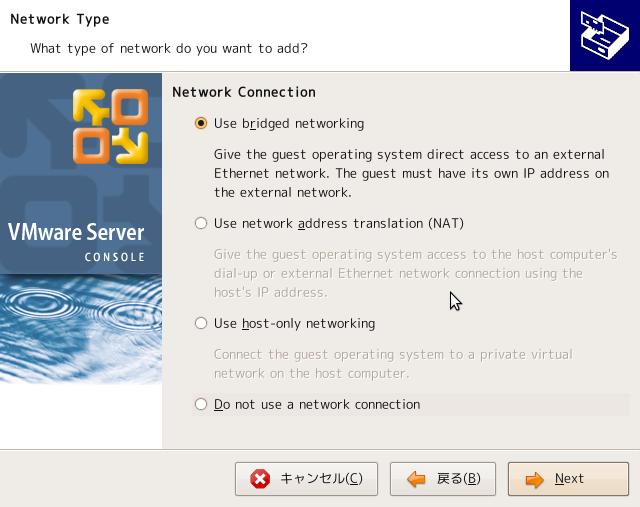
まぁ普通にBridgeにしてつながらなかったらNATにあとで変えればいいと思います。
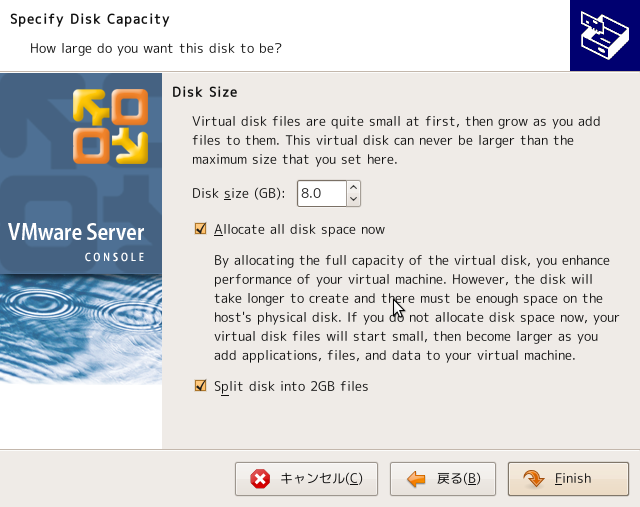
最大ディスク使用量を決めます。
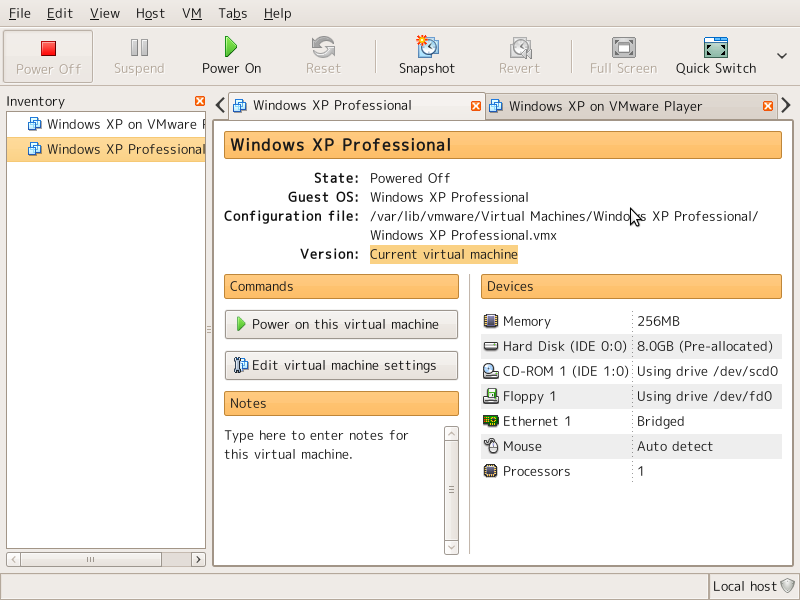
いざ作成開始

これでPower on this virtual machineを選択すれば無事起動します。
8.VMware-toolsのインストール
Windowsをインストールした後、各種ドライバをインストールする為に、VMware-toolsをインストールします。
Windowsoを起動後、VMware server consoleのメニューより、
VM→Install VMware tools…を選択します。
すると、VMware toolsのインストールCDが入った状態になりますので、マイコンピュータなどを開いてインストールをします。
WIndowsのインストールってらくちんやなぁ・・・
かくはともあれ、これで説明終了です。
おまけ
インストールする際に、パッチをあてずに
- Before running VMware Server for the first time, you need to configure it byinvoking the following command:
"/usr/bin/vmware-config.pl". Do you want this program to invoke the command for you now? [no]yes
と答えると、以下のようなエラーがでてインストールできません。
Extracting the sources of the vmmon module.
Building the vmmon module.
Using 2.6.x kernel build system.
make: ディレクトリ/tmp/vmware-config7/vmmon-only' に入ります/usr/src/linux-headers-2.6.27-11-generic’ に入ります
make -C /lib/modules/2.6.27-11-generic/build/include/.. SUBDIRS=$PWD SRCROOT=$PWD/. modules
make[1]: ディレクトリ
CC [M] /tmp/vmware-config7/vmmon-only/linux/driver.o
In file included from /tmp/vmware-config7/vmmon-only/./include/machine.h:24,
from /tmp/vmware-config7/vmmon-only/linux/driver.h:15,
from /tmp/vmware-config7/vmmon-only/linux/driver.c:49:
/tmp/vmware-config7/vmmon-only/./include/x86.h:830:1: warning: "PTE_PFN_MASK" redefined
In file included from include/asm/paravirt.h:7,
from include/asm/irqflags.h:55,
from include/linux/irqflags.h:57,
from include/asm/system.h:11,
from include/asm/processor.h:17,
from include/linux/prefetch.h:14,
from include/linux/list.h:6,
from include/linux/module.h:9,
from /tmp/vmware-config7/vmmon-only/linux/driver.c:12:
include/asm/page.h:22:1: warning: this is the location of the previous definition
In file included from /tmp/vmware-config7/vmmon-only/linux/vmhost.h:13,
from /tmp/vmware-config7/vmmon-only/linux/driver.c:71:
/tmp/vmware-config7/vmmon-only/./include/compat_semaphore.h:5:27: error: asm/semaphore.h: No such file or directory
/tmp/vmware-config7/vmmon-only/linux/driver.c:146: error: unknown field ‘nopage’ specified in initializer
/tmp/vmware-config7/vmmon-only/linux/driver.c:147: 警告: initialization from incompatible pointer type
/tmp/vmware-config7/vmmon-only/linux/driver.c:150: error: unknown field ‘nopage’ specified in initializer
/tmp/vmware-config7/vmmon-only/linux/driver.c:151: 警告: initialization from incompatible pointer type
/tmp/vmware-config7/vmmon-only/linux/driver.c: In function ‘LinuxDriver_Ioctl’:
/tmp/vmware-config7/vmmon-only/linux/driver.c:1670: error: too many arguments to function ‘smp_call_function’
make[2]: *** [/tmp/vmware-config7/vmmon-only/linux/driver.o] エラー 1
make[1]: *** [_module_/tmp/vmware-config7/vmmon-only] エラー 2
make[1]: ディレクトリ/usr/src/linux-headers-2.6.27-11-generic' から出ます/tmp/vmware-config7/vmmon-only’ から出ます
make: *** [vmmon.ko] エラー 2
make: ディレクトリ
Unable to build the vmmon module.
For more information on how to troubleshoot module-related problems, please
visit our Web site at "http://www.vmware.com/download/modules/modules.html" and
"http://www.vmware.com/support/reference/linux/prebuilt_modules_linu…
Execution aborted.
このエラーに私は苦しみました。。。
パッチはしっかりあててからインストールをしましょう^^
参考記事